After your online estimate, we schedule a field measurement to verify sizing and finalize window details before manufacturing your custom windows.

Which Method Is Right?
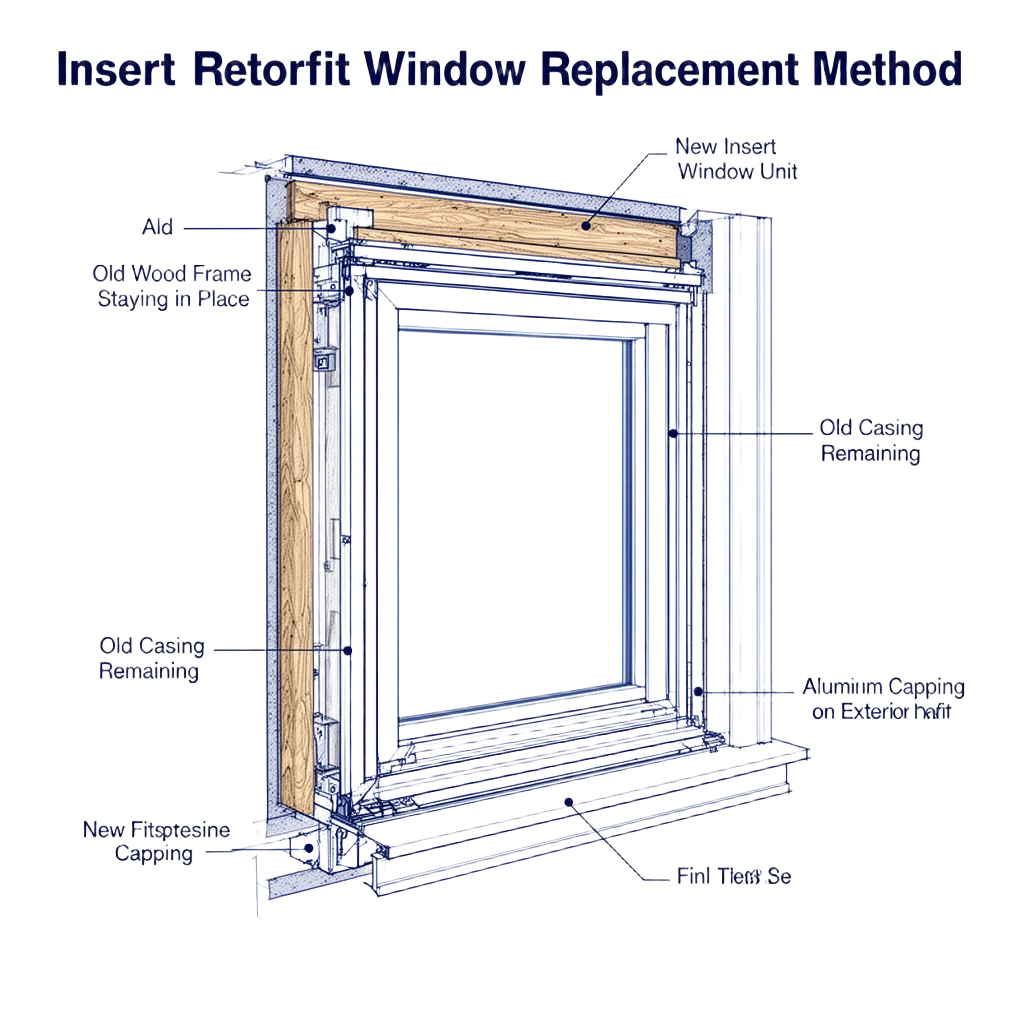
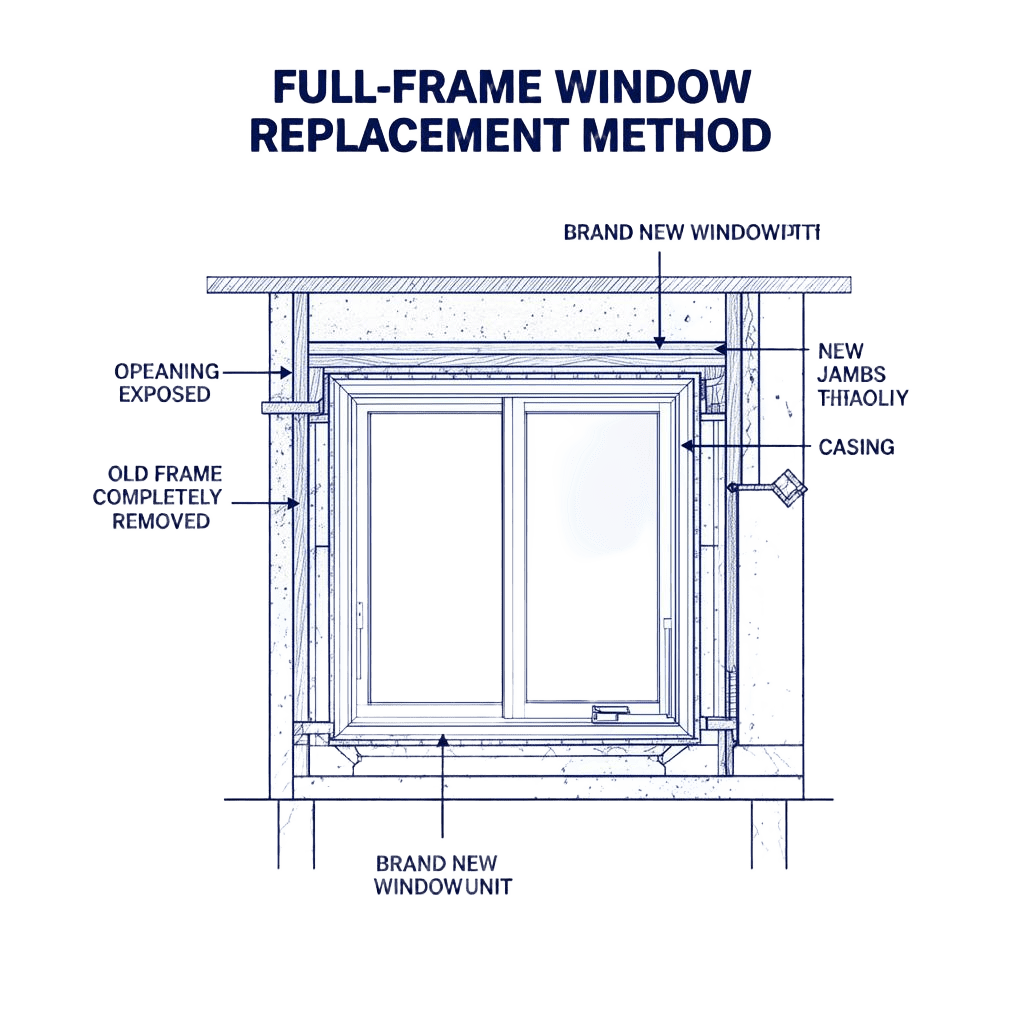
Most Chicago-area projects use insert (retrofit) replacement. Full-frame tear-outs are only recommended in specific cases.
Best when the existing frame is solid and rot-free.
Old frame completely removed; new unit installed with new jambs and trim.
We custom-bend aluminum capping on site to protect old exterior wood and give your windows a clean, finished look. In most insert replacement projects, the existing exterior trim stays in place and is wrapped with color-matched aluminum.
It improves appearance, helps reduce maintenance, and gives the exterior a cleaner final result without replacing all surrounding trim.